How do I create a new translation request?
Log into the Jeenie Translation Portal and submit your content for translation right from your dashboard in just a few clicks.
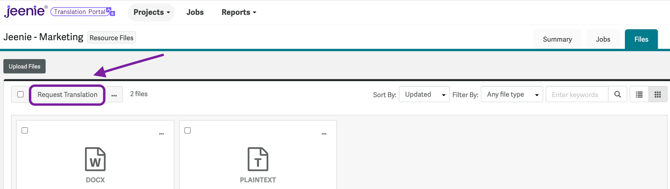
1. Find the "Request Translation" Button
First, navigate to your main Jobs Dashboard, alternatively to Project and Jobs or go directly to the Project and Files tab where your source content lives. Look for the main button that says "Request Translation."


2. Complete the Translation Request Form
A window will pop up asking for a few key details. Think of this as giving our language experts everything they need to succeed:
Step 1
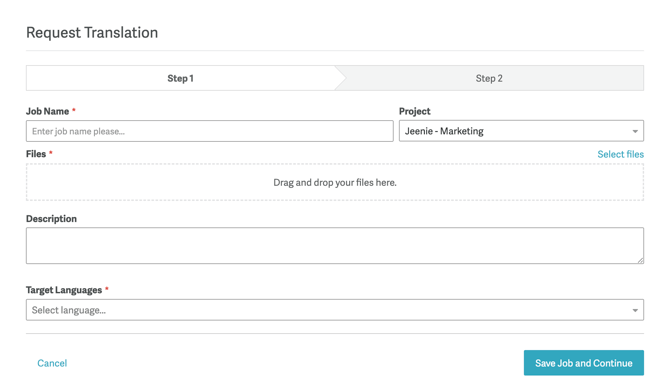
| Field | What We Need | Jeenie Tip |
| Job Name | Give your request a clear, simple name. | Keep it specific—something like "Patient Consent Form - Spanish" or "Q4 Newsletter - All Languages." |
| Project | The Project your content belongs to - normally you don't have to change this. | Your content is automatically organized into Projects to keep everything tidy. |
| Files | Easily drag and drop your file(s) or select them from your computer. We accept many file types! | Make sure you have the final version of the source file in an editable version ready to go. |
| Description | Add any important context or instructions for our translators. | This is crucial for quality! Let us know who the content is for (e.g., healthcare staff, patients, marketing audience) and if there are any specific terms to watch out for. |
| Target Languages | Select the languages you need your content translated into. | If you need all available languages in your project, you can "Select displayed results" to save time. |
3. Review and bring your translation on the way!
Step 2
On the next screen, you’ll be able to review the request details.

-
See Your Estimate: You’ll instantly see a summary of your translation job, including a quick Cost Estimate and the expected delivery timeframe based on your request.
- If required, you can request a Rush Translation.
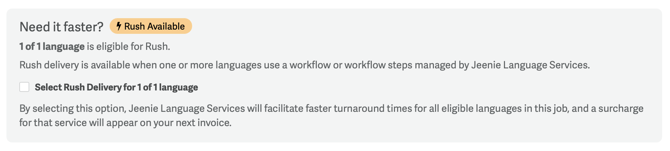
- Pick a Workflow: Chose the workflow that fits your needs.
-
Finalize: When everything looks perfect, confirm and "Authorize Job".

Once you click that final button, your request officially kicks off, and our team gets to work eliminating language barriers for your organization!
What if I’m not ready to start the translation right away?
No problem! We understand that timing is everything.
If you complete the form but aren't ready to start the clock, simply choose the option to "Save for Later."
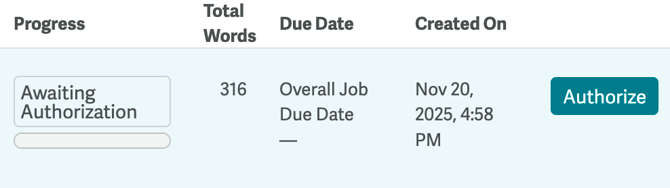
Your request will be saved as a Draft in the status Awaiting Authorization in your Jobs Dashboard. It will sit patiently in your queue until you are ready to go back in, confirm the details, and officially Authorize it. The translation process won’t begin until you give it the green light!